FAQ: How to add color gradients?
Our gradient feature is still under development. If you have any questions or if you have an input image with a gradient that is not detected correctly please contact us by email:
support@vectorizer.io
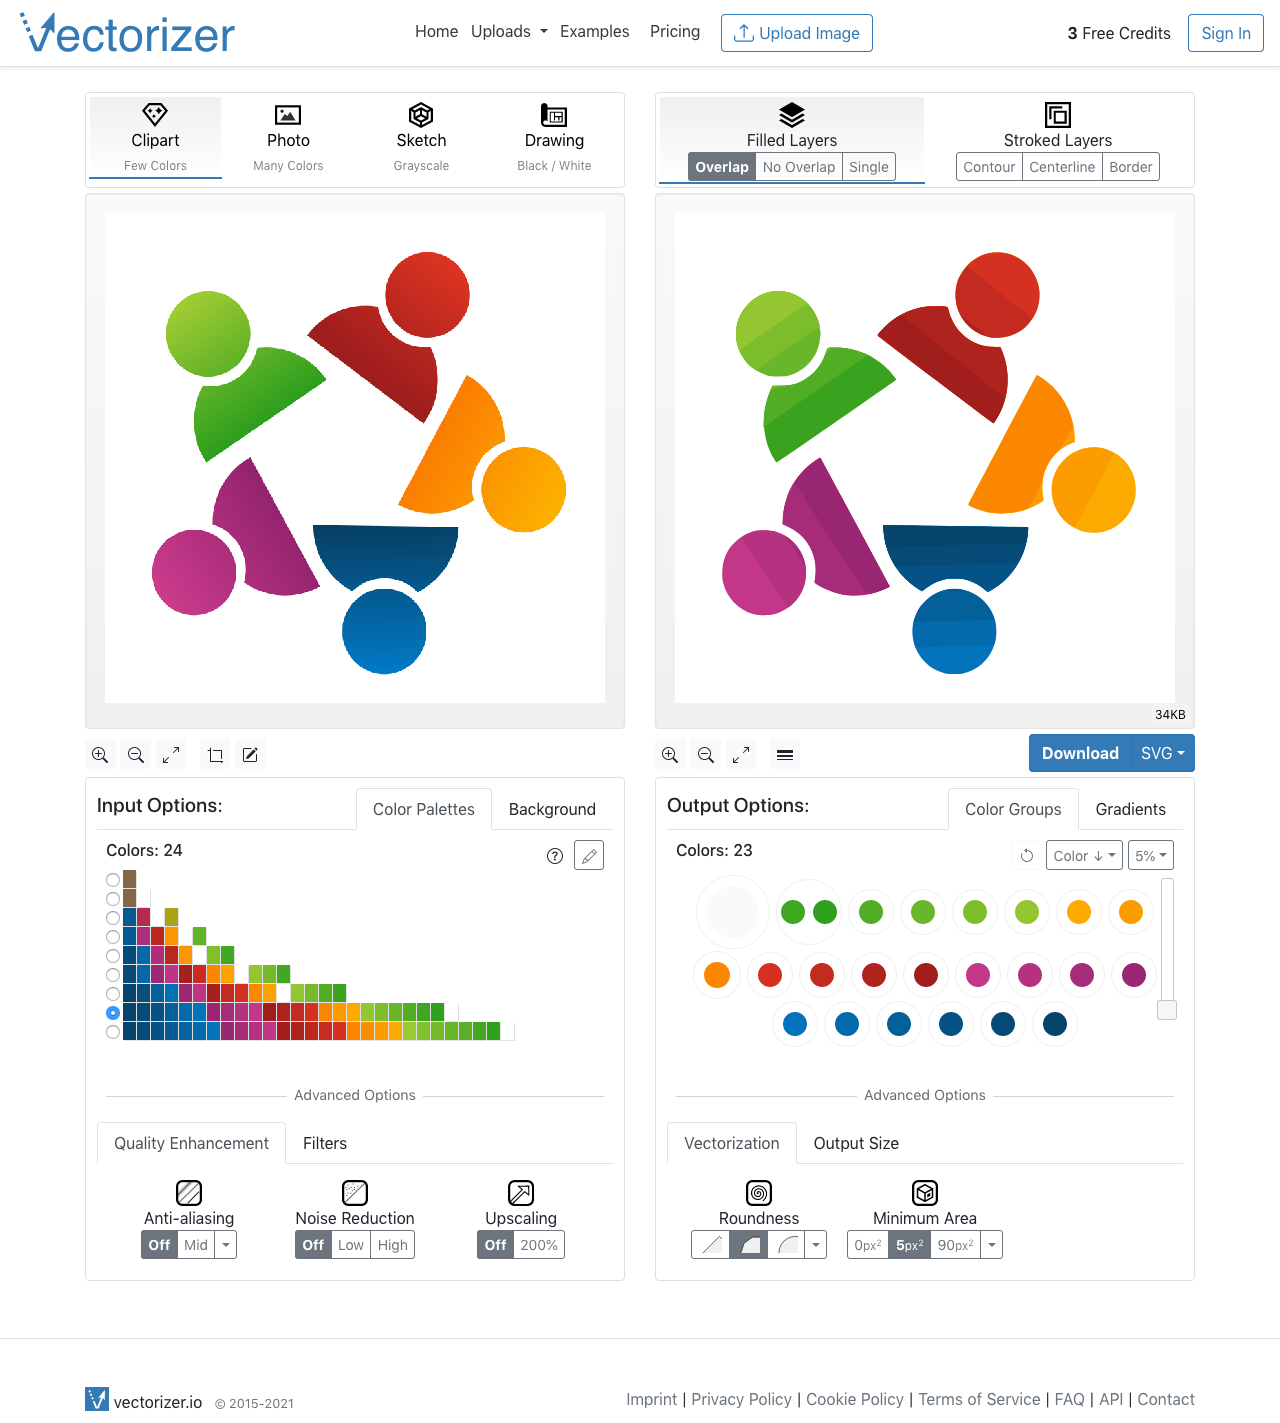
Step 1:
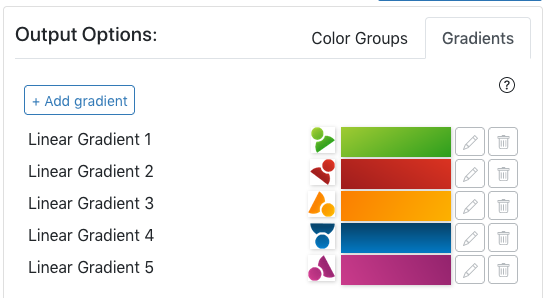
This example input image has 5 different linear gradients.
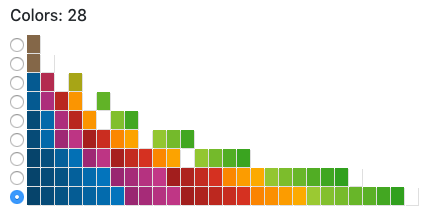
Step 2:
Depending on the number of colors there are more or less color "steps" in the output vectorization result.

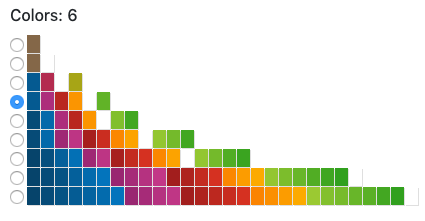
Step 3:
To use our automatic gradient detection tool it is recommend to reduce the numbers of colors so that there are clear visible color "steps" in the output or even a solid color for each gradient. This makes it easier in the next step to select the parts of the image which should be included in the gradient. Also the gradient detection is based on the original input pixel colors and not based on the currently visible vector colors in the output. Sometimes using the "crop" feature to vectorize only a part of an input image is very useful if only a part of an image contains a gradient.

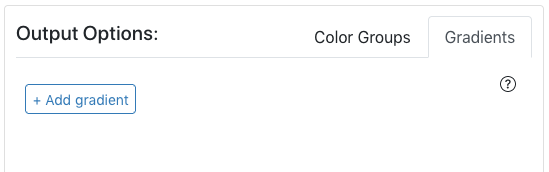
Step 4:
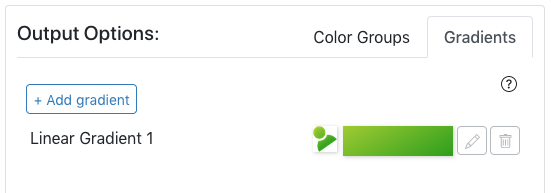
To open the gradient creation dialog select the tab "Gradients" and click "Add Gradient".

Step 5:
Click each part of the image which should be included in this gradient with the mouse. In this example click the two shapes of the green person. The other gradients follow in separate steps. Click "Calculate Gradient" to start the automatic gradient detection.

Step 6:
Once the gradient detection is complete the detected gradient type is displayed. Currently "Linear Gradient" and "Radial Gradient" types are supported.
Step 7:
Repeat "Add Gradient" for all gradients in the image.
Step 8:
Sometimes the automatic gradient detection might not calculate an optimal result. In this case you can edit the gradient manually. For demonstration we add a new color step at 50% and adjust the position (start/end) point of the gradient.

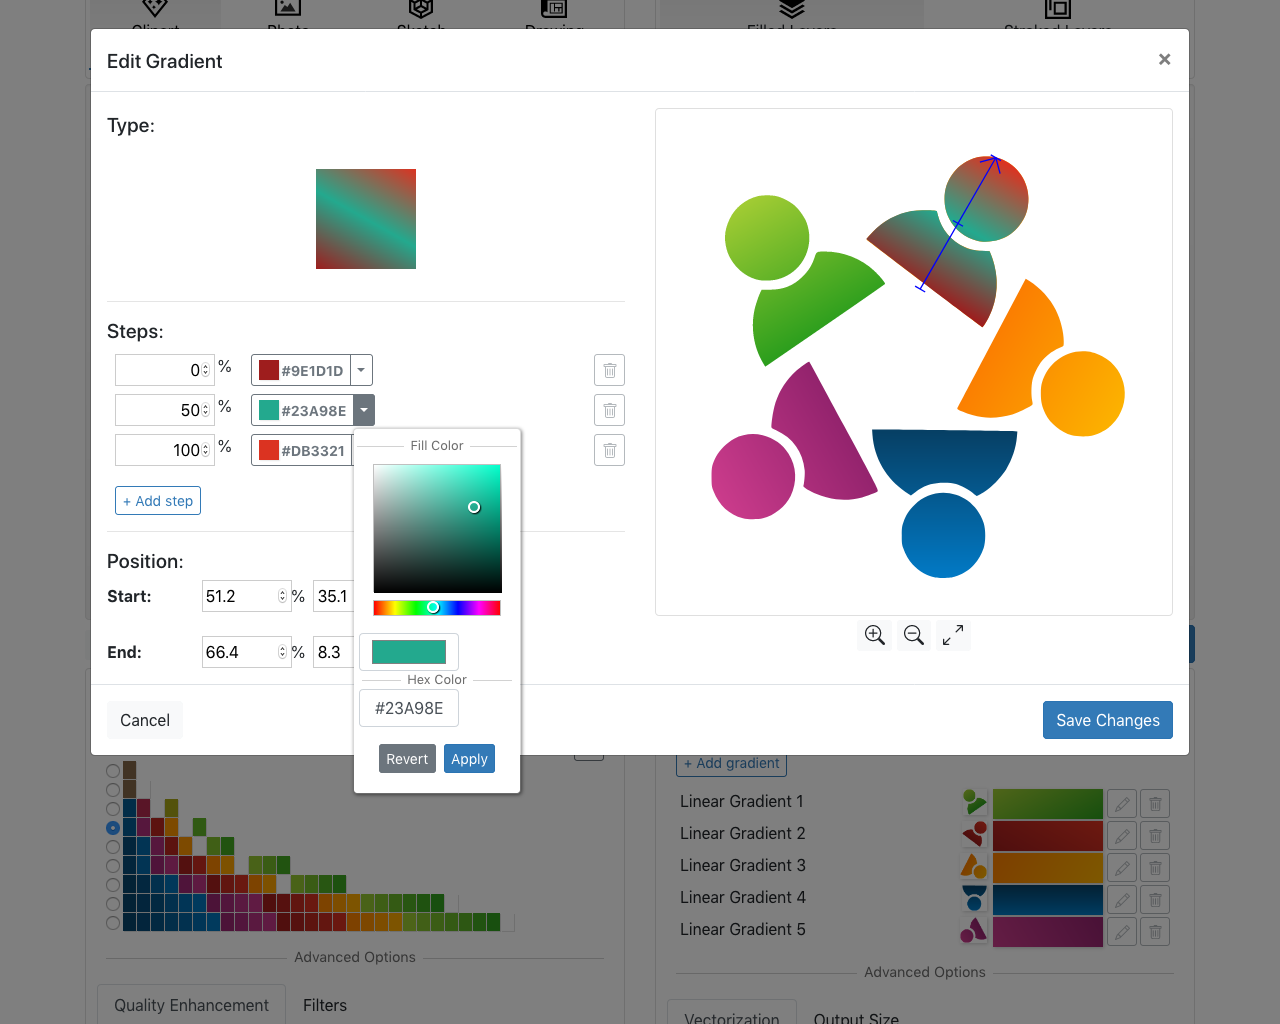
Step 9:
Verify in the output preview that all gradients look good and that there are no more visible color steps.


Step 10:
Not all output file formats support gradients. Once you have added all the gradients of your image, select the download format "SVG" or "EPS" for best gradients compatibility.
